Kheema: 10 super tasty and quick recipes

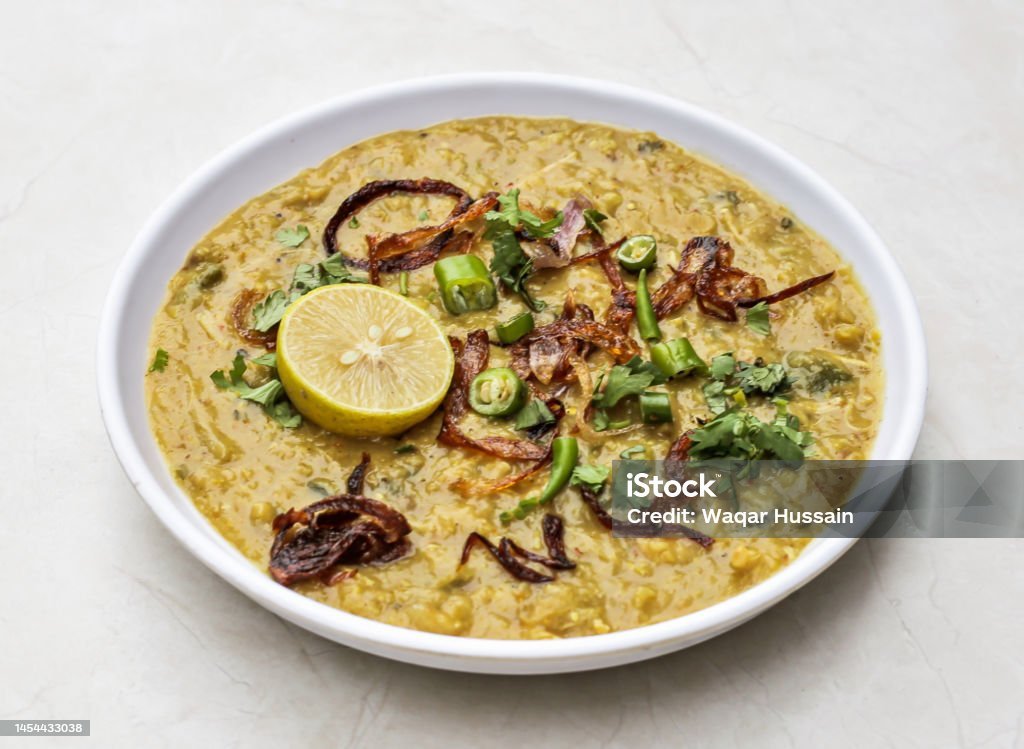
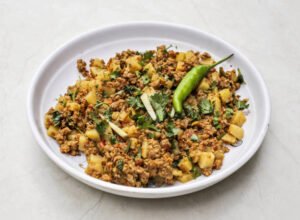
The Indian subcontinent is the source of the flavorful dish kheema, which is made with minced meat cooked with a variety of aromatic spices and occasionally vegetables. This is a very flexible dish that can be made with lamb, chicken, or beef, and it has many different versions that can be made vegetarian-style with paneer, soy, or lentils. Kheema is a popular option in Indian cooking because of its rich flavours and textures. It is usually served with bread or rice. Because of its versatility and capacity to accommodate a variety of dietary requirements, kheema is a popular and extensively consumed dish worldwide.

kheema

1. Classic Kheema:
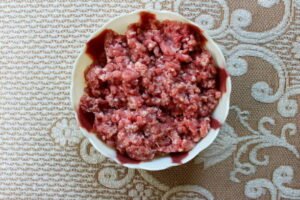
Mixture of minced meat (beef, lamb, or chicken)
Finely chopped onion, tomato, ginger, and garlic paste
Green chilies, chopped
Spices: Turmeric, cumin, coriander powder, garam masalaSalt to tasteFresh coriander leaves, chopped
Instructions:
In a pan with heated oil, add the onions and cook until golden brown.Add the green chilies and ginger-garlic paste, and cook for one minute.Add tomatoes and cook, stirring, until softened.Cook the minced meat until it takes on colour.Stir in the salt, turmeric, cumin, coriander powder, and garam masala. Blend thoroughly.Cook, covered, until the flavours are well combined and the meat is tender.Serve hot with bread or rice, garnished with fresh coriander leaves.

2. Keema Matar (Kheema with Peas):
Additional Ingredients:Green peas (fresh or frozen)

Instructions:
Use the traditional recipe for kheema, but add peas in addition to the minced meat and modify the cooking time.

3. Egg Kheema:
Additional Ingredients:Hard-boiled eggs

Instructions:
Prepare the classic kheema base and add sliced or chopped hard-boiled eggs during the final stages of cooking. Simmer for a few minutes until the eggs absorb the flavors.Feel free to adjust the spice levels and ingredients according to your taste preferences!

4. Potato Kheema:Additional
Ingredients:Potatoes, diced

kheema
Aloo qeema or potato keema served in plate isolated on table top view of indian and pakistani spicy food

Instructions:
Proceed with the traditional kheema recipe, but substitute diced potatoes for the minced meat. Cook the potatoes longer or shorter until they are soft.

5. Paneer Kheema:
Additional Ingredients:Paneer (Indian cottage cheese), crumbled


Directions: After preparing the traditional kheema base, add the crumbled paneer and cook until it becomes crispy. Simmer until the flavours seep into the paneer.

6. Kheema with mushrooms:
Extra Ingredients: Sliced mushrooms

Instructions:
Make kheema according to the traditional recipe, but instead of using minced meat, add sliced mushrooms. After the mushrooms are thoroughly cooked, adjust the cooking time.These variations offer options for vegetarians (potato and paneer kheema) and mushroom lovers, adding variety to your kheema recipes. Have fun trying out these various flavours!

7. Kheema made from soy:
Extra Ingredients: Chunks or granules of soybean
Instructions:
Make the traditional kheema recipe, but instead of using minced meat, use chunks or granules of rehydrated soy. Simmer until the flavours seep into the soy.

8. Fish Kheema:Additional Ingredients:Boneless fish fillets, diced

Instructions:
Cook the traditional kheema base and then add the diced fish fillets in the last minute of cooking. Simmer the fish for the entire cooking time.

9. Lentil Kheema:
Additional Ingredients: Mixed lentils (such as masoor, moong, and chana dal)
Instructions:
Make the traditional kheema recipe, but instead of using minced meat, use mixed lentils. Cook lentils until they become tender and soft.
10. Tofu Kheema:
Additional Ingredients:Firm tofu, crumbled
kheema
Instructions:
Make the traditional kheema base and stir in the crumbled tofu just before serving. Simmer until the flavors seep into the tofu. Vegetarians and those interested in trying out other protein sources have options with these variations. Have fun experimenting with these many kheema recipes!
FAQ:

What are the different sorts of meat used in Kheema recipes?

Kheema may be made with a number of meats including lamb, goat, pork, bird, or turkey. Each kind of meat brings its own specific taste profile to the dish.

kheema
Raw minced mutton in a bowl

Can Kheema be made with vegetarian substitutes?

Yes, Kheema may be made with vegetarian substitutes which includes minced tofu, soy granules, or maybe mushrooms for individuals who prefer a meatless version of the dish.

What are the important spices utilized in Kheema recipes?

Essential spices used in Kheema recipes consist of cumin, coriander, turmeric, garam masala, chili powder, and occasionally cinnamon, cloves, or cardamom, relying on local versions and private preferences.
How do you are making Kheema at domestic?

There are numerous techniques to make Kheema at domestic, however the basic steps involve sautéing onions, garlic, and ginger, browning the beef, adding spices, after which simmering with tomatoes and different elements till the flavors meld collectively.

https://amzn.to/3HTOYYB
Can I use pre-ground meat for Kheema recipes?

Yes, you can use pre-ground meat for Kheema recipes. However, freshly floor meat regularly yields a higher texture and flavor.
Are there any local variations of Kheema throughout India?

Yes, there are numerous regional versions of Kheema throughout India. For example, in North India, Kheema is regularly cooked with peas and potatoes, while in South India, it may be organized with coconut milk and curry leaves.

https://amzn.to/3OBMPod
Can Kheema be frozen for later use?

Yes, Kheema may be frozen for later use. Allow it to cool absolutely earlier than transferring it to an hermetic box or freezer bag. It may be saved inside the freezer for up to three months.

What are a few creative approaches to serve Kheema?

Kheema can be served in numerous approaches inclusive of with rice, roti (Indian flatbread), naan, or filled in sandwiches or wraps. It can also be used as a filling for samosas or pies.

Are there any healthier options or changes for conventional Kheema recipes?

Yes, there are more healthy alternatives and modifications for traditional Kheema recipes consisting of the usage of lean meats, reducing the amount of oil or ghee used for cooking, and incorporating more veggies like spinach, carrots, or bell peppers for introduced nutrients. Additionally, using low-fat yogurt instead of cream can also loosen up the dish with out compromising on flavor.

Kaddu ki Kheer

kaddu ki kheer

 Examining Indian Cuisine’s Richness: Kaddu ki Kheer

There are countless flavors and textures hiding within the rich tapestry of Indian cuisine, just waiting to be explored. “Kaddu ki Kheer,” a traditional dessert with deep roots in Indian culture, is one of these culinary delights that is less well-known but equally delicious. A popular dessert in homes all over the nation, this aromatic, creamy pumpkin concoction has a special balance of sweetness and warmth.
Origins and Significance to Culturehttps://amzn.to/3SwU0is
The origins of Kaddu ki Kheer can be found in the northern regions of India, where pumpkins are widely available and highly valued for their culinary versatility. Indian cuisine has traditionally praised pumpkin-based dishes for their nutritional content and adaptability to a variety of climates.
In addition to being a delectable treat, Kaddu ki Kheer has cultural significance and is frequently served at religious ceremonies and celebrations. Every household adds a unique touch to the recipe, which has been passed down through the generations, and the preparation varies from place to region.
Components and Methodology The allure of Kaddu ki Kheer is its simplicity—it only needs a few ingredients that combine to produce a harmonious blend of flavors.
bottle gourd, milk, sugar, and a mixture of fragrant spices like saffron and cardamom are the main ingredients. Peeling, seeding, and finely grating the bottle gourd  releases its inherent sweetness and earthy notes. After that, the grated pumpkin is cooked in a large amount of milk until it becomes soft and blends in with the base that is creamy.
The aromatic spices infuse their essence into each spoonful of kheer as the mixture thickens and sugar is added to sweeten it. The flavors meld together during the slow cooking process, producing a rich, golden dessert that is decadent and comforting. Finally, chopped nuts are added to the kheer’s garnish, giving it a delightful crunch that contrasts with its velvety texture.
A Gastronomic Adventure Kaddu ki Kheer offers a sensory trip through the vibrant tapestry of Indian flavors with each spoonful. The creamy richness of the milk contrasts with the subtle sweetness of the bottle gourd, and the spices give the dish more nuance and complexity. Warmth and nostalgia are evoked by the harmonious blending of flavors and textures in every bite.
Benefits for NutritionIn addition to its delicious flavor, Kaddu ki Kheer is a healthy dessert option because of its many nutritional advantages. Rich in vitamins, minerals, and antioxidants, pumpkins are well-known for strengthening the immune system and fostering a healthy digestive system. When combined with the healthful properties of milk and nuts, this dessert offers a well-rounded treat that pleases the body and the palate.
Innovative Cuisine As much as Kaddu ki Kheer pays homage to tradition, it also acts as a platform for culinary creativity, encouraging cooks to play around with flavors and ingredients. Contemporary renditions could incorporate novel approaches like substituting dairy with coconut milk or incorporating unique spices like cinnamon and nutmeg for a chic touch.
In conclusion Kaddu ki Kheer sticks out in the colorful tapestry of Indian cuisine as a testament to the depth of flavor and the cultural legacy that shape the cuisine’s character. This well-liked dessert, which offers a taste of tradition with every spoonful, has captured hearts and palates since its modest beginnings and has continued to do so in modern interpretations.
Thus, relish the essence of India’s culinary legacy the next time you have a craving for something sweet and cozy—immerse yourself in the warmth and aroma of Kaddu ki Kheer.
A delicious Indian dessert called Kaddu ki Kheer blends the rich, creamy richness of milk with the subtle sweetness of pumpkin and a hint of spice. Here’s a thorough and illustrative recipe to help you make this decadent dessert at home.

Ingredients list:

500 grams of ripe pumpkin (kaddu), peeled, deseeded, and grated
1 liter of full-fat milk
1 cup of sugar (adjust to taste)
1 teaspoon of ghee (clarified butter)
4-5 green cardamom pods, lightly crushed
A pinch of saffron strands (optional)
Chopped nuts for garnishing (almonds, cashews, pistachios)
A few strands of saffron for garnishing (optional)

Instructions:

How to Prepare a Pumpkin: Choose a sweet, ripe pumpkin to start. After peeling and seeding the pumpkin, finely grate it with a fine-mesh grater. To ensure even cooking and better blending with the milk, make sure the pumpkin is finely grated.
Cooking the Milk: Lightly heat the ghee in a pan with a heavy bottom or a kadhai. When the ghee is heated through, add the grated pumpkin to the skillet.
Grated pumpkin should be sautéed in ghee for a few minutes to release its juices and soften slightly. This process brings out the pumpkin’s inherent sweetness. Now add the milk to the pan with the pumpkin that has been sautéed. After giving everything a good stir, reduce the heat to a simmer.
Preparing the Kheer: Simmer the pumpkin and milk mixture on low to medium heat, stirring from time to time to keep the milk from sticking to the pan’s bottom. The pumpkin will continue to soften and take on the flavors of the milk as the mixture cooks. Continue to simmer the kheer until it reaches the desired consistency. This procedure might take thirty to forty minutes.
Sweetening and Flavoring: After the kheer reaches the right consistency, sweeten it with sugar to suit your tastes. To fully dissolve the sugar, give it a good stir. Add the cardamom pods to the kheer after gently crushing them to release their aroma. At this point, you can also incorporate a small amount of saffron strands for flavour and colour.https://amzn.to/3upyhkA
Garnishing and Serving: Take the kheer off the heat as soon as it is perfectly cooked and filled with the flavours of the spices.Before serving, allow the kheer to cool slightly. Add chopped nuts (almonds, cashews, or pistachios) as a garnish for a delicious crunch and visual appeal. Before serving, you may choose to add a few strands of saffron to the top of the kheer to give it a more elegant appearance.
Serving suggestions: Depending on your preference, Kaddu ki Kheer can be served warm or cold. It tastes best served as a dessert following a substantial meal or at special events and festivities.For a lovely presentation, serve the kheer in individual bowls or glasses and decorate with extra chopped nuts and saffron strands.Savour the classic Indian dessert Kaddu ki Kheer, which is rich and creamy and will tickle your taste buds and make you feel cosy and warm.
kaddu ki kheer

SHAHI TUKDA :No 1savoury &mesmerizing dessert recipe

Enhancing Your Shahi Tukda Experience:

An gastronomic expedition With the delicious Shahi Tukda, you can indulge in the regal world of Indian desserts. This dish skillfully blends rich flavors with a hint of royal elegance. This well-liked dessert has a long and intriguing history, and its flavor has endured.

genesis and chroniclesShahi Tukda, literally meaning “royal piece,” has its origins firmly ingrained in Indian Mughlai cuisine. According to legend, the Mughal emperors’ royal kitchens are credited with creating this dessert, which demonstrates their love of decadence and culinary skill. Over the ages, the dish has changed to reflect different regional influences while still maintaining its core as a representation of luxury.

The State of the Art Display Its magnificent presentation is what distinguishes Shahi Tukda. Bread slices that have been deep-fried and dipped in a rich sugar syrup with saffron are the usual ingredients of the dish. The accompanying rabri, or thickened sweetened milk, has a creamy texture that contrasts delightfully with the bread, which is typically toasted to a golden brown. Shahi Tukda is aesthetically pleasing and delicious, especially when adorned with slivered almonds, pistachios, and edible silver leaf.

How to Make the Ideal Shahi Tukda: To make this regal dessert at home, you need to balance the flavours and textures just right. First, choose fresh bread that is slightly thick, cut it into the desired shapes, and deep fry it until golden brown. To give the fried bread a lovely yellow hue and a hint of sweetness, make a fragrant sugar syrup that has been infused with saffron threads.

One of the main ingredients of Shahi Tukda, rabri, is made by simmering milk until it becomes thick and rich. This delicious mixture, which is flavored with cardamom and sweetened with sugar, gives the dessert a velvety layer. To assemble the dish, spread heaping spoonful of rabri over the soaked bread, resulting in a mouthwatering harmony of flavors and textures.

Adaptations and Novelties Dessert aficionados have a soft spot for the classic recipe, but over time, inventive variations have appeared. While some culinary artists experiment with flavored syrups, others offer contemporary twists like fruit compotes or chocolate drizzles. While satisfying changing tastes, these innovations pay homage to Shahi Tukda’s timeless appeal. Advice for the Ideal Experience with Shahi Tukda

Use these professional pointers to enhance your Shahi Tukda creation.

Choice of Bread: Choose freshly baked bread that is slightly thick to guarantee the ideal ratio of crispness to absorbency. Brioche or milk bread is very effective.

shahi tudka

Saffron Infusion: For a deeper flavor and brighter color, steep saffron threads in warm milk before adding them to the sugar syrup.

Rabri Expertise: When making rabri, patience is essential. Stirring constantly, simmer the milk over low heat until it thickens to a velvety consistency. Its aromatic profile can be improved by adding a small pinch of nutmeg.

Elegant Garnishing: In addition to adding visual appeal, the garnish adds texture. For an elegant touch, try experimenting with different nuts, such as cashews or even dried rose petals.

Temperature Is Important: Serving Shahi Tukda slightly warm will yield the best flavor. This enables the flavors to symphonize harmoniously on your palate, enhancing their flavor.

Individual Touch: Do not hesitate to add your unique touch to the dish. Adding a special touch, like a drizzle of honey or a dusting of cinnamon, can make your Shahi Tukda genuinely unique. You can become an expert at making Shahi Tukda that not only honors custom but also demonstrates your culinary skill by following these tips. Step on board this gastronomic adventure now and enjoy the royal treat that is Shahi Tukda.

https://amzn.to/4bsDf0L

Ingredients:

6 slices of bread1 cup ghee (clarified butter)

1 cup sugar

1 cup water

A pinch of saffron strands

1 cup full-fat milk1/2 cup condensed milk

1/2 teaspoon cardamom powder Chopped nuts (almonds, pistachios)

for garnish Edible silver leaf (optional)

https://spicesaroma.com/haleem/

Instructions:

To make sugar syrup, put sugar and water in a saucepan. Heat it until it becomes a boiling sugar syrup. For color and fragrance, add saffron strands to the syrup. Reduce the heat and simmer until the mixture becomes somewhat sticky. Put aside. Slice the bread into the desired shapes before frying it. Toast the bread slices in hot ghee until they turn golden brown on both sides. Remove extra ghee.

shahi tudka
single string

To make Rabri, put milk in a pan and heat it until it boils. After adding cardamom powder and condensed milk, simmer until the mixture thickens to the consistency of rabri. Stir from time to time.


Put Shahi Tukda together: Make sure the fried bread slices are well soaked but not overly moist by dipping them into the prepared sugar syrup. Place the slices of soaked bread on a serving platter. Make sure that every slice of bread is well coated by pouring the thickened rabri over it.

Garnish: To improve adherence, gently press chopped nuts into the rabri as a garnish. Use edible silver leaf as a decorative option to add a classic touch.Serve: Shahi Tukda should be served warm to allow the flavours to mingle.Savour the opulent and majestic Shahi Tukda, an authentic masterwork among Indian desserts!

shahi tudka
Shahi tukra/tukda or Double ka meetha is a bread pudding Indian sweet of fried bread slices soaked in rabid or sweet saffron milk garnished with dry fruits

Haleem top 5delicious&ranked recipes of hyderabad

haleem

“Savouring the Tradition: An Intimate Look into Haleem’s Past and Present”.

Greetings:

Food lovers have a special place in their hearts and palates for Haleem, a culinary masterpiece that crosses boundaries and time. With its origins firmly ingrained in the Indian subcontinent’s cultural tapestry, this flavorful and rich dish has come to represent joyful celebration and social harmony. We will go into the history, components, cooking method, and cultural significance and recipe of Haleem in this blog post, examining why it is grown to be a staple in a variety of cultures.

History and Origin: The origins of Haleem can be found in the Mughal era, when the royal kitchens combined Indian and Persian culinary elements to create a dish. Once referred to as “Harissa,” this wholesome, slow-cooked dish made its way into the hearts of the general public and developed into the well-known haleem that we know today. Its renown goes beyond India; Middle Eastern and Central Asian cuisines have their own takes on the dish, each contributing a distinctive touch.

Ingredients and Preparation: A harmonious combination of wheat, barley, lentils, meat (typically mutton or chicken), and numerous spices make up Haleem. These ingredients become a thick, velvety porridge during the slow cooking process, which is where the magic happens. The flavors converge during the slow simmering process, producing a rich and satisfying symphony of flavor. Because it is traditionally made during the fasting month of Ramadan, Haleem is even more significant as a dish that promotes community and unity.

Cultural Significance: Haleem is a vital component of unity, even in addition to its delicious flavor. This dish is prepared and shared communally during Ramadan, forging connections across cultural and religious divides. Due to its widespread association with festivities, marriages, and festivals, Haleem is a dish that stands for harmony and sharing in many cultures.

Regional Differences: Attractive regional variations in Haleem notwithstanding, the basic ingredients remain unchanged. For instance, the Hyderabadi Haleem Festival, held every year in Hyderabad, attracts both residents and visitors who come to enjoy the city’s distinctive interpretation of this culinary masterpiece. Every area adds a unique touch to Haleem, whether it is through the use of ghee, fried onions as a garnish, or the type of meat used. This results in a dish that is both dynamic and diverse.

Haleem

https://spicesaroma.com/kunafa/

In summary, the flavor of Haleem embodies the rich history, cultural fusion, and unity inherent in each spoonful. This dish’s popularity has spread throughout the world, and it is praised for both its depth of flavor and the feelings it arouses. As you relish every morsel of Haleem, keep in mind that you.

https://amzn.to/482Q66D

Ingredients:

1 cup broken wheat
1/2 harees rawa/ semolina
1/2 cup lentils (mix of red lentils and split chickpeas)
500g boneless meat (chicken or mutton), cut into small pieces

1large onion, finely sliced and fried
2 tablespoons ginger-garlic paste
1 teaspoon turmeric powder1 tablespoon red chili powder
1 teaspoon garam masala
Salt to taste
4 tablespoons cooking oil or ghee
Fresh coriander leaves and thinly sliced ginger for garnish and fried onions

Instructions:

Wash and Soak Grains: Combine the washings of lentils, harees rawa, and broken wheat. Let them sit in water for a minimum of two hours.
Haleem
Cook Meat: Until the meat is tender and the water has evaporated, cook it in a large pot with salt. Put aside.
Grain Preparation: Soak grains in enough water in a different pot and cook until they are mushy and soft. To speed up the cooking process, use a pressure cooker.Combine Grains and Meat: Using a food processor or hand blender, combine the cooked grains into a smooth paste. After the meat has cooked, add it and mix thoroughly.Heat up some oil or ghee in a pan to cook onions. After adding, cook the onions until they are golden brown.
Spices: Sauté the ginger-garlic paste for a few minutes after adding it to the browned onions. Garam masala, red chilli powder, and turmeric powder should be added. Blend thoroughly.
Blend Everything Together: Stir in the ground beef mixture and blended grains. Stir well. If necessary, add more water to adjust the salt and consistency.
Haleem
Making of Hyderabadi Haleem .
Simmer: Give the Haleem at least 30 to 40 minutes on low heat to simmer. To avoid sticking, stir from time to time
Garnish and Serve: Add sliced ginger and fresh coriander leaves to the Haleem once it has reached a thick consistency. Hot servings are recommended.Savour the delicious dish that combines the richness of grains and the tenderness of meat with your homemade haleem!
Haleem

KUNAFA

Title: The Irresistible Delight of Kunafa: A Culinary Journey

Introduction:

A delicious dessert from the Middle East, kunafa has captured palates all over the world with its unusual blend of flavors and textures. This blog explores the history, preparation, and pure joy that those who are lucky enough to partake in Kunafa bring to those who consume it.
The Chronicles of Kunafa :Originating in the Arab world, Kunafa’s rich history is woven throughout the varied fabric of Middle Eastern cuisine. Its origins can be found in the Ottoman Empire, where the sweet, aromatic syrup and the delicate layers of shredded phyllo dough produced a dessert fit for sultans
Sweets, Dessert,
Ingredients for a Harmonious Dance: The carefully chosen ingredients are the foundation of any good kunafa recipe. Perfectly crisp layers are created using phyllo pastry, finely shredded to form the foundation known as kataifi dough.
A symphony of flavors is produced by the combination of butter, sugar, and the fragrant essence of orange blossom or rose water. Pistachios’ nutty crunch provides the finishing touch that turns Kunafa into a culinary masterpiece.
The Technique of Layering: Kunafa crafting is an art form that demands accuracy and patience. The thin layers of Kataifi dough are carefully stacked to produce a crispy outside that opens up to reveal a rich interior. The filling, whether it is sweetened cream cheese or rich ricotta, is essential for counteracting the sweetness and delivering a creamy texture.
Baking Brilliance: The layers of dough and filling bake into a golden masterpiece, revealing the magic of Kunafa. Dessert aficionados are in for a sensory treat that begins with the aroma that fills the kitchen.
The Sweet Elixir: Sugar Syrup: A dash of sugar syrup finishes off a kunafa. Perfectly cooked, the syrup adds a delightfully tart note that balances the dessert’s richness. Transferring it onto the warm Kunafa guarantees that each layer takes in the delectable sweetness.
Garnishing Glory: A dusting of chopped pistachios, or any other preferred nuts, adds a textural contrast, a delightful crunch, and a pop of color to top off this royal dessert. Kunafa becomes an enticing work of art with the final touch, transforming it from a culinary creation.
The Pleasure of Delighting: When you slice into a Kunafa, the layers present themselves, and your palate is treated to a symphony of flavors. A long-lasting sensory experience is produced by the contrast of crunchy and creamy, sweet and nutty.
In conclusion, kunafa is a testament to the Middle East’s culinary prowess, having crossed international boundaries to become a beloved dish. Enjoyed during celebratory events or in private moments of indulgence, kunafa continues to be a representation of the rich history and exquisite artistry inherent in Middle Eastern cuisine. With Kunafa, take a trip through taste and tradition, and let each bite be a celebration of superb cuisine.

Ingredients: 1 pound of shredded phyllo dough, or Kataifi dough

1 cup unsalted butter, melted
1 cup chopped pistachios or your choice of nuts
1 cup sugar
1 cup water
1 tablespoon lemon juice
1 teaspoon rose water (optional)
1 cup ricotta or sweetened cream cheese (for filling)

Instructions:

Set the oven temperature to 350°F (175°C).Divide the Kataifi dough with your fingers into thin strands. Thoroughly coat the shredded dough with melted butter by mixing it in. To make a base layer, press half of the mixture into the bottom of a baking pan that has been greased.
Pouring beaten eggs into frying pan. Making omelette series.
Drizzle the dough with ricotta or sweetened cream cheese. To create the top layer, sprinkle the remaining shredded dough mixture over it.Bake for 30–40 minutes, or until golden brown, in an oven that has been preheated.
kunafa
l
While baking, dissolve the sugar in the water over a medium heat to make the sugar syrup.
Mix in the rose water, if using, and lemon juice. Reduce heat and simmer until slightly thickened. When the Kunafa is still hot from the oven, evenly cover it with the sugar syrup.
kunafa
Top with chopped pistachios or any other kind of nuts. Let it cool down before cutting and serving. Savor the dessert  you made yourself!
kunafa
Turkish dessert kunefe, kunafa, kadayif with pistachio powder and cheese hot eaten a sweet

Rawa Dosa

Title: Crispy Rava Dosa Recipe: A Step-by-Step Guide to Irresistible South Indian Delight.:

With our foolproof Rava Dosa recipe, you can immerse your taste buds in the delicious world of South Indian cuisine. This crispy delight is not only quick and easy to prepare, but it also has the potential to improve your home cooking skills.
A popular and adaptable South Indian dish, dosa has become well-known both in India and around the world.

This is a quick overview of dosa history:

Origin: Karnataka, Tamil Nadu, Andhra Pradesh, and Kerala are the states in South India where dosa first appeared. It is a mainstay of South Indian cooking and can be eaten for breakfast, as a snack, or even as a small dinner.Ingredients: Rice and urad dal, or black gramme, are combined to make the traditional dosa batter. These ingredients undergo an overnight fermentation process after being soaked and smoothed out. The batter gains a hint of tanginess from the fermentation process.

Types :A crispy, thin pancake served with sambar and chutney is called a plain dosa.

Masala Dosa: A dosa stuffed with a mixture of spices and potatoes.

Rava dosa: Its distinct texture comes from the combination of rice flour and semolina, or rava.Set dosa: Typically served in sets, these little, thick, and spongy dosas are.Pesarattu: A dosa, typically served with upma, that is prepared with green Gramme (moong dal).

Cooking Method: Dosas are cooked in a hot, flat skillet or griddle. Thinly spreading the batter results in a big, round pancake. It has a crisp, golden-brown texture because it is frequently cooked with a drizzle of oil.Sambar, a vegetable stew made with lentils, coconut chutney, and tart tomato chutney are some of the typical accompaniments for dosas.

Global Popularity: Dosa has become more and more well-known all over the world because of its mouthwatering flavour and adaptability. It is frequently seen on Indian restaurant menus across the world.

Cultural Significance: Dosa is an integral part of meals, festivities, and daily cooking in South Indian households. It is common for generations to pass down the skill of creating the ideal dosa.In conclusion, dosa is more than just a meal; it is a beloved component of Indian cuisine that is recognised for its diversity and capacity to satisfy a wide range of palates. It is also a cultural icon.

Dosa can help with weight loss if it is included in a balanced diet. How to do it is as follows:

Low-Calorie Choice: When weighed against some other breakfast options, dosa has comparatively few calories. Choosing a dosa made of whole grains, such as rice and urad dal, gives you energy without packing on too many calories.

Abundant in Protein: One of the staple ingredients of dosa batter, urad dal, is a good source of protein. Protein keeps muscles healthy and increases feelings of fullness, which makes overeating less likely.

Complex Carbohydrates: Whole grains, such as rice, provide the carbohydrates in dosa. Because these complex carbs release energy gradually, they satisfy you for longer periods of time and lessen your desire to reach for unhealthy snacks.Fibre Content: Eating dosa batter made with whole grain varieties increases dietary fibre. Fibre supports healthy gut flora, facilitates digestion, increases feelings of fullness, and helps with weight management.Low in Saturated Fat: When cooked with moderate oil, dosas usually contain very little saturated fat. Its weight-friendly profile is further improved by selecting healthier cooking oils.

Modifiable Ingredients: Vegetables are a low-calorie but high-nutrient option when it comes to toppings or accompaniments for dosas. This gives the meal more volume without greatly increasing the amount of calories consumed.

Portion Control: Maintaining a healthy weight requires paying attention to portion sizes. Portion control is made possible by dosas, which you can serve with wholesome sides like chutney or sambar for extra taste and nutrition.Remember that the foundation of any weight loss plan is moderation and overall dietary balance. Although dosa can be included in a healthy diet, a well-rounded diet must include a variety of nutrient-rich foods to balance it out.

Make a Rava Dosa worthy of a restaurant by following our easy-to-follow instructions, and your family will be begging for more.

Ingredients: 1 cup rava or semolina1

/4 cup yoghurt,

1/2 cup rice flour,

and 1/2 cup all-purpose flour

1 finely diced onion,

1finely chopped green chilli, and

1 tablespoon grated ginger

2 tablespoons finely chopped coriander leaves

1/2 tablespoon cumin seeds

1/2 teaspoon of black pepper.

Salt to taste, and water for batter consistency.Oil for cooking.

Instructions:

Get the batter ready for rava dosa:constantly, gradually add water to make a smooth, lump-free batter.To guarantee the best consistency, let the batter rest for thirty minutes.

Add Flavours: Mix in the black pepper, salt, cumin seeds, chopped coriander leaves, green chilies, finely chopped onions, and grated ginger into the batter. Blend thoroughly.

RAVA DOSA


Modify Consistency: You can add extra water to the batter to change its consistency if necessary. It ought to be sufficiently thin to spread readily on the pan.Heat the Pan: Set a medium-heat cast-iron pan that is well-seasoned or nonstick on medium heat. Prior to pouring the batter, make sure the pan is sufficiently hot.

RAWA DOSA

Pour and Swirl: To make a thin layer, use a ladle to pour the batter onto the pan in a circular motion. The intricate, lace-like pattern of Rava Dosa is what makes it so beautiful.Drizzle Oil: For an irresistible crunch, drizzle oil over the top and around the edges of the dosa.Cook Everything to Perfection:Cook until the dosa crisps up and the edges begin to turn golden brown. Rava dosas cook on one side, so there is no need to flip them.

rava dosa
Making of paper plain Dosa on a tawa pan by spreading dosa batter mix of rice and dal and oiling on the thin sheet

https://amzn.to/3u8K07a

Serve Hot:

Serve your favourite South Indian side dish, such as coconut chutney, alongside your crisp Rava Dosa.In conclusion, you now possess the secret to making the ideal Rava Dosa at home. This savoury, crispy treat will make a lasting impression on your loved ones. It perfectly embodies the essence of South Indian culinary expertise. Savour each bite for its explosion of flavours and textures!

rava dosa
Indian Food, Indian Culture, Spice – Freshly made staple South Indian breakfast

https://spicesaroma.com/gulab-jamun

Gulab Jamun

“Delight Reimagined: An Exploration of Gulab Jamun’s Past and Present”


.Overview:

Taste buds have been captivated by the mouth-melting texture and irresistible sweetness of Gulab jamun, a popular Indian dessert, for centuries. We will go on a delightful historical tour of Gulab Jamun in this blog, learning about its beginnings and uncovering the mysteries that make it a unique treat in every home.

Where Did Gulab Jamun Come From?

The rich history of Gulab jamun originates in mediaeval India, when Persian and Turkish sweets had an influence on the dish. The word “Gulab Jamun” itself combines the words “Gulab,” which means rose, and “Jamun,” which is the name of a fruit that is dark purple.

The dessert’s round, rose-colored appearance is accurately described by its name. According to legend, the personal chef of Mughal Emperor Shah Jahan was the one who initially made Gulab jamun. The recipe changed over time, and different places added their own special touches to this delicious treat. these  Jamun’s Unique Features Gulab jamun is a celebration in every bite, not just a dessert.

https://amzn.to/48XBXsF

What distinguishes it is as follows: Gulab jamun is renowned for its thick, milky texture, which absorbs the sweet syrup in which it is dipped. Every bite of the finished product is a sweet explosion

Aromatic Spices: Jamun’s flavor is enhanced by the fragrant warmth imparted by the use of cardamom and occasionally saffron in the dough

Caramelised Exterior: It takes skill to get the ideal caramelised exterior. jamun forms a thin, crisp layer that contrasts beautifully with its soft interior when deep-fried until golden brown.Gulab jamun’s versatility is phenomenal. It tastes great warm or cold, and for a decadent twist, some people even enjoy it with a scoop of vanilla ice cream.

Making the Optimal Gulab Jamun: A Guide:

After learning about the origins and unique characteristics of Gulab jamun, let us get started making this delicious dessert at home

https://amzn.to/3w8LbDT

Ingredients list:

One cup of Khoya, or less milk 2

tsp of all-purpose flour small amount of baking soda

1-2 tablespoons of milk (to knead)Either cooking oil or ghee

About Sugar Syrup:One cup of sugarOne cup of water.A couple of saffron strands1/2 teaspoon powdered cardamom

Directions:

Combine baking soda, all-purpose flour, and khoya. Gradually add a small amount of milk to create a smooth and soft dough. Roll small portions of the dough into smooth balls after dividing it. The balls should be fried in hot ghee or oil until golden brown.

GULAB JAMUN

gulab jamun

Dissolve the sugar in the water in a separate pan to make a sugar syrup. Stir in cardamom powder and saffron threads. Let the syrup cool until it becomes the consistency of a single string. Make sure to thoroughly coat the fried Gulab Jamun by dipping them into the warm sugar syrup.

gulab jamun
single string


Give them a few hours to soak so the jamuns can absorb the syrup. In summary, Gulab jamun is more than just a dessert it is a link to ages-old culinary customs and the happiness of indulging together. Gulab jamun is still a delightful representation of cosines and festivities, whether you are making it in your kitchen or enjoying it during special occasions.

Gulab jamun

Explore the flavors and rich history of this well-known Indian treat, and allow the enchantment of jamun to enhance your moments

Gulab jamun

https://spicesaroma.com/palak-paneer-lips-smacking-recipe

Tips to make soft Gulab jamuns

Use these suggestions to guarantee soft and delicious gulab jamuns. First, make a smooth dough with milk powder or khoya (reduced milk solids); add a tiny bit of ghee to make it more rich. Make sure the dough is slightly sticky but not too soft.

GULAB JAMUN

Roll into tiny, smooth spheres without any breaks; this affects the texture. Keep the heat at a steady medium-low while frying to ensure that the jamuns cook through all the way through. To turn them a golden-brown color, turn them gently. To prevent uneven cooking, avoid packing too many food into a small pan with too much oil.

After frying, allow the  jamuns to cool a little before adding them to the heated sugar syrup. To avoid the outer layer hardening too quickly, the syrup should be warm rather than boiling. Make sure the  jamuns thoroughly absorb the syrup by letting them soak in it for a sufficient amount of time.

A dash of saffron or cardamom added to the sugar syrup intensifies its flavour. Add some chopped nuts as a garnish for a special touch. These instructions will result in incredibly soft and delicious gulab jamuns.

PALAK PANEER: LIPS SMACKING RECIPE

PALAK PANEER

Title: Delectable Delight: A Recipe for Palak Paneer and Its Health Advantages

palak paneer

Introduction :

The flavor of spinach (Palak) and the creamy texture of paneer (Indian cottage cheese) come together in this delicious and nourishing Indian dish called Palak Paneer. It has numerous health advantages in addition to being a culinary delight. The nutritional benefits of Palak paneer will be discussed as we delve into the recipe’s culinary exploration. Popular Indian dish Palak paneer has a long history entwined with the subcontinent’s culinary legacy. This dish’s roots are in Northern India, specifically in the state of Punjab, according to some accounts.

The terms “paneer” and “Palak” denote Indian cottage cheese and spinach, respectively. For centuries, North Indian cuisine has been characterized by the traditional and cherished use of these two primary ingredients. The development of Palak paneer has been greatly influenced by Punjabi cuisine, which is renowned for its hearty and aromatic dishes. This dish was probably inspired by the region’s abundant agricultural output, which included dairy and fresh spinach.

Owing to its distinctive combination of flavors and textures, the dish became well-known throughout India and surrounding areas. Another reason for the popularity of Palak paneer is the growing demand for Indian food throughout the world. Due to its healthful ingredients and flavorful spices, Palak paneer became a popular vegetarian option as Indian restaurants and cuisine expanded throughout the world.

In addition to being delicious, Palak paneer has cultural significance. It is frequently made for celebrations, family get-togethers, and festive occasions, which makes it a representation of cosines and hospitality in Indian homes. Although the exact date of Palak paneer’s invention is unknown, the dish’s enduring popularity demonstrates the vegetarian delight’s enduring appeal. Presently, it remains a mainstay in Indian eateries and kitchens across the globe, providing a delightful fusion of heritage, customs, and fine dining.

https://amzn.to/48XBXsF

Health Benefits:

High in Iron and Vitamins: One of the main ingredients, spinach, is a nutrient-dense source of iron and vitamins. In addition to boosting immunity generally, this helps fight anemia.

Packed with Protein: Paneer is a great source of protein that helps build and repair muscles. Additionally, it enhances the sensation of fullness, which aids in managing weight.

Digestive Health: When cumin seeds and ginger are combined, the digestive system is healthier and bloating and indigestion are less common.

https://spicesaroma.com/gulab-jamun/

Minimal Calorie:

Palak paneer is a calorie-conscious choice that is ideal for individuals who want to enjoy a tasty meal without overindulging in calories. Strong and healthy bones are maintained by consuming a sufficient amount of calcium, which is found in spinach.

Blood Sugar Regulation: A diabetic-friendly dish, Palak paneer is made possible by the fibre in spinach, which helps to control blood sugar levels.

palak paneer

Ingredients for the recipe:

fresh spinach leaves (palak)Paneer, or soft cheese

Onions,

Garlic,

Ginger,

Tomatoes

Green chilies

Cumin seeds

Garam masala

Turmeric powder

Salt Cooking oil Cashews (optional)

Guidelines:

After blanching the spinach leaves in hot water, puree them smoothly in a blender. Ginger, garlic, onions, and cumin seeds should be sautéed until golden brown. Cook the mixture until it thickens into a paste after adding the tomatoes and green chilies. Mix the paste with salt, garam masala, and turmeric powder. Add the pureed spinach and simmer until thoroughly heated. Add the paneer cubes and let them soak up the flavors.

Serve hot, garnished with cilantro, over rice or roti.

palak paneer

In conclusion, Palak paneer offers a healthy combination of nutrients in addition to its savory flavors that entice the senses. This dish offers the ideal ratio of flavor to nutrition, making it a delightful addition to any menu, whether you are a food enthusiast or a health-conscious person. Savor the deliciousness of a properly prepared Palak paneer by giving it a try today!
Please let me know in the comments how much you enjoy the recipe.

https://connectingmindz.com/wall-paintings/ ‎